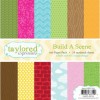
Today, I am sharing with you a tutorial on how to "build a scene." Creating scenes with dies is a wonderful way to challenge
yourself creatively and get the most from your die collection. I enjoy designing scenes, because it provides a wonderful
opportunity to play with dimension, layers and shapes. Sometimes, what I
envision works out perfectly. Other times, well let’s not discuss the other
times… In the case of the card I am
sharing with you today, I created it with my husband in mind. As an active duty
service member, my husband is called away for work. However, even with the
distance between us, no matter where he is and where the children and I are, we
are sleeping underneath the same heavenly stars. And in that regard, we are
home and together, if only in our dreams.

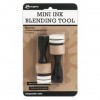
*Helpful hint. Before starting, it is nice to have a few
tools handy to make building scenes easier. I always have on my desk: a dish to
collect scene die cuts, fine-tipped liquid glue adhesive, tweezers, foam
adhesive (usually fun foam for better, even coverage) and score tape.

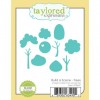
First, die cut and assemble the pieces needed for the
scene. If a die cut piece is delicate, die cut it several times and glue
together for added stability. There is a possibility that you will not use all
the pieces as you see which pieces works together. This is okay. Use the extra
die cut pieces for the next time you build a scene. (Note: This is also the
time where I layout my scene to see which die cut pieces will work with the
scene and placement. I also think about support for the die cut pieces and
where to hide foam adhesive.)

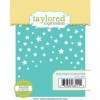
Using the Starry Night Cutting Plate, die cut the image
from Sugar Cube and Blue Corn cardstock. Being careful to keep the stars in
place for both die cuts. Gently turn the Blue Corn panel over and apply Scotch
tape adhesive to the back to keep the stars in place. (Note: It is at this point
that I applied Imagine Crafts’ Sheer Shimmer Spritz for a little extra starry
night sparkle.)

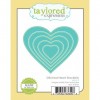
Using Post It tape, center the medium-sized heart from the
Stitched Heart Stacklets onto the front of the Blue Corn die cut panel. This is
also a great time to figure out sentiment placement if you are adding one to
the front of your card.

Apply adhesive, using a fine-tipped liquid adhesive, onto
the back of the white stars and adhere to the Blue Corn panel in a random
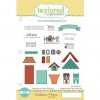
fashion to create the starry night panel. Using a sentiment from the Welcome
Home stamp set, VersaMark ink, an embossing buddy, white, fine embossing powder
and heat tool, emboss the sentiment “home sweet H•O•M•E.”

To create the moon, use the moon stamp from the Light up the Night stamp set and Sugar Cube pigment ink. Using the Blue Corn die cut panel, position the moon at the desired location within the scene. Stamp image.


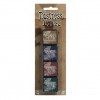
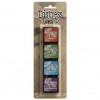
Cut a piece of Sugar Cube cardstock measuring 3 7/8” x 5
1/8”. Using Distress Inks: first apply a
layer of Tumbled Glass to the entire panel.
Next, apply Salty Ocean while leaving some of the Tumbled Glass inking
showing through. Apply Chipped Sapphire to the edges and slightly overlapping
the Salty Ocean. Apply Black Soot to the very edge, and then using a pouncing
motion, add to the blue areas. Lastly, go back over the inked panel with
Tumbled Glass to smooth out the ink and lighten any areas that are too dark.
(Note: After applying each Distress Ink layer, I used the Blue Corn die cut
panel to make sure the inked area, that would be exposed through the
heart-shaped aperture, looked like the night sky I was seeking to achieve.)
To create the moon, use the moon stamp from the Light up the Night stamp set and Sugar Cube pigment ink. Using the Blue Corn die cut panel, position the moon at the desired location within the scene. Stamp image.

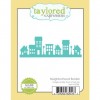
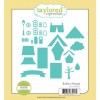
Time to build a support for the scene. Attach the
Neighborhood Border die cut piece to the back of the Blue Corn die cut panel
with tape adhesive. Using foam adhesive, adhere foam pieces to the back of the
Blue Corn panel. Remove adhesive, and careful position and apply the inked
night panel to the back of the Blue Corn die cut panel. Turn the assembled panel over, and begin
adhering the house and tree die cuts using a combination of liquid and foam
adhesive.

Happy Crafting,
Keia
Card Size: A2
Card Supplies:


Such a sweet card Keia. Love the layering and the great scene. Pretty colors!
ReplyDelete